It is indeed bothersome to see stripping down walls on your home interior, especially that your home is supposed to be the place where you’d feel the most comfortable.
It will be challenging to feel comfortable in a home with walls that badly need fixing; a well-deserved fresh coat of paint just to get that luster it once had.
So, if you’re someone wanting to repaint their old walls and looking for tips and solutions online, well – you’ve come to the right place.
Without further ado, here are 5 Interior Paint Problems And How To Fix Them in Anchorage, AK.
1. Paint Blisters
When you start noticing bubbles or blisters forming on the surface of your freshly painted wall, it’s likely that you’re dealing with paint blisters. These annoying imperfections can cause a bumpy, uneven finish, and while they may seem like just a cosmetic issue, they often signal deeper underlying problems.
What Causes Paint Blisters?
Paint blisters happen when moisture gets trapped under the surface of the paint. As you apply the paint, the moisture begins to work its way out, creating pockets of air that form bubbles or blisters on the surface. There are a few common causes that contribute to the formation of paint blisters:
-
High Humidity: Excess moisture in the air can be drawn into the surface, causing the paint to lift and form bubbles. This is especially common in areas with high humidity or during periods of heavy rain.
-
Painting on a Damp Surface: If the surface you’re painting is even slightly damp, the moisture can get trapped under the paint layer, preventing proper adhesion and causing blisters to form as it tries to escape.
-
Re-coating Too Quickly: If you’re re-coating your walls before the previous layer has fully dried or cured, the moisture from the underlying coat can cause blisters when trapped beneath the new layer of paint.
How to Prevent and Fix Paint Blisters
Now that we know the causes, let’s look at what you can do to prevent and fix this issue. Here’s a breakdown of effective strategies:
1. Ensure Proper Drying and Curing
Before applying any paint, ensure the surface is thoroughly dry and free from moisture. This is essential for both new coats and the first application of paint. If you’ve recently repaired a wall or applied filler, make sure the surface is completely dry before painting.
2. Wait for Optimal Weather Conditions
Humidity is one of the biggest culprits of paint blisters, so it’s best to paint when the weather is dry. If you live in a region with high humidity, try to paint during a dry season or wait for a period of lower humidity. If painting outdoors, check the forecast and avoid painting if it’s expected to rain.
If extreme humidity is unavoidable, consider painting in the early morning or late afternoon when temperatures and humidity levels are lower. You could also try installing vents or exhaust fans to increase airflow and help moisture escape.
3. Use a Quality Primer
A good primer creates a solid foundation for your paint, improving adhesion and providing a moisture barrier. Choosing the right primer is crucial, especially when you’re dealing with a repaint project. For walls that are prone to moisture (like bathrooms or kitchens), use a moisture-resistant primer to help prevent trapped moisture from causing blisters. This will also give your new coat of paint better durability and a smoother finish.
4. Apply Paint in Thin Layers
If you’re re-coating, it’s important to avoid applying paint too quickly or in thick layers. Thin coats dry more evenly and allow the underlying layers to cure completely, reducing the chances of moisture being trapped. Make sure each coat is fully dry before applying the next layer.
5. Make Sure the Surface is Clean and Smooth
Dirt, dust, or grease on the surface of the wall can prevent paint from adhering properly, leading to blisters. Clean your walls thoroughly before starting your painting project to ensure the surface is smooth and ready to accept the new coat of paint.
6. Repair Any Surface Issues
If there are existing blisters on your painted surface, you’ll need to fix them before repainting. Scrape away any blisters carefully, and smooth out the surface. If there are underlying moisture problems causing the blisters, address those first. You may need to patch the area and allow it to dry fully before reapplying paint.
How to Fix Existing Blisters:
If you’ve already encountered blisters after painting, here’s how you can fix them:
-
Scrape off the Blisters: Once the paint is dry, carefully use a scraper or sandpaper to remove the blistered areas. You should be able to peel or scrape off the bubbled paint down to a smooth, dry surface.
-
Repair the Surface: If the wall is damp, wait for it to dry completely. You may need to repair the damaged surface using a patching compound or joint compound, smoothing it down with a putty knife. Once it’s dry, sand it to a smooth finish.
-
Prime the Area: Apply a fresh coat of primer to the sanded area, allowing it to dry completely. The primer will help seal the surface and prevent any further moisture from causing blisters.
-
Repaint the Area: Once the primer has dried, repaint the affected area using thin, even coats. Make sure the surface is dry and free of moisture before applying each layer.
2. Paint Chalking
If you’ve noticed loose powder forming on your walls, this could be a sign of paint chalking. Paint chalking occurs when the surface of the paint starts to break down and turns powdery, often due to low-quality paints that contain a high level of pigment extenders. These extenders are inexpensive fillers that give paint more volume but can also affect the paint’s durability. Additionally, bright colors or paints with a large amount of tint are more prone to chalking. This is because they tend to break down more quickly when exposed to weather or wear and tear.
To fix paint chalking, you’ll first need to scrape off the loose, powdery paint from the affected area. Afterward, it’s essential to properly prime the surface before repainting. The primer helps to create a smooth surface for the new paint to adhere to and also provides a better seal, preventing future chalking.
To avoid chalking in the future, it’s highly recommended that you invest in high-quality paint. Quality paints are designed to last longer, resist wear, and offer better protection against environmental factors, reducing the likelihood of chalking. If you are working with bright colors or highly pigmented paints, choosing premium paint will ensure that the color remains vibrant and doesn’t begin to break down quickly.
By taking the extra steps to invest in good materials and prep work, you can prevent chalking and ensure that your walls stay looking fresh and clean for much longer!

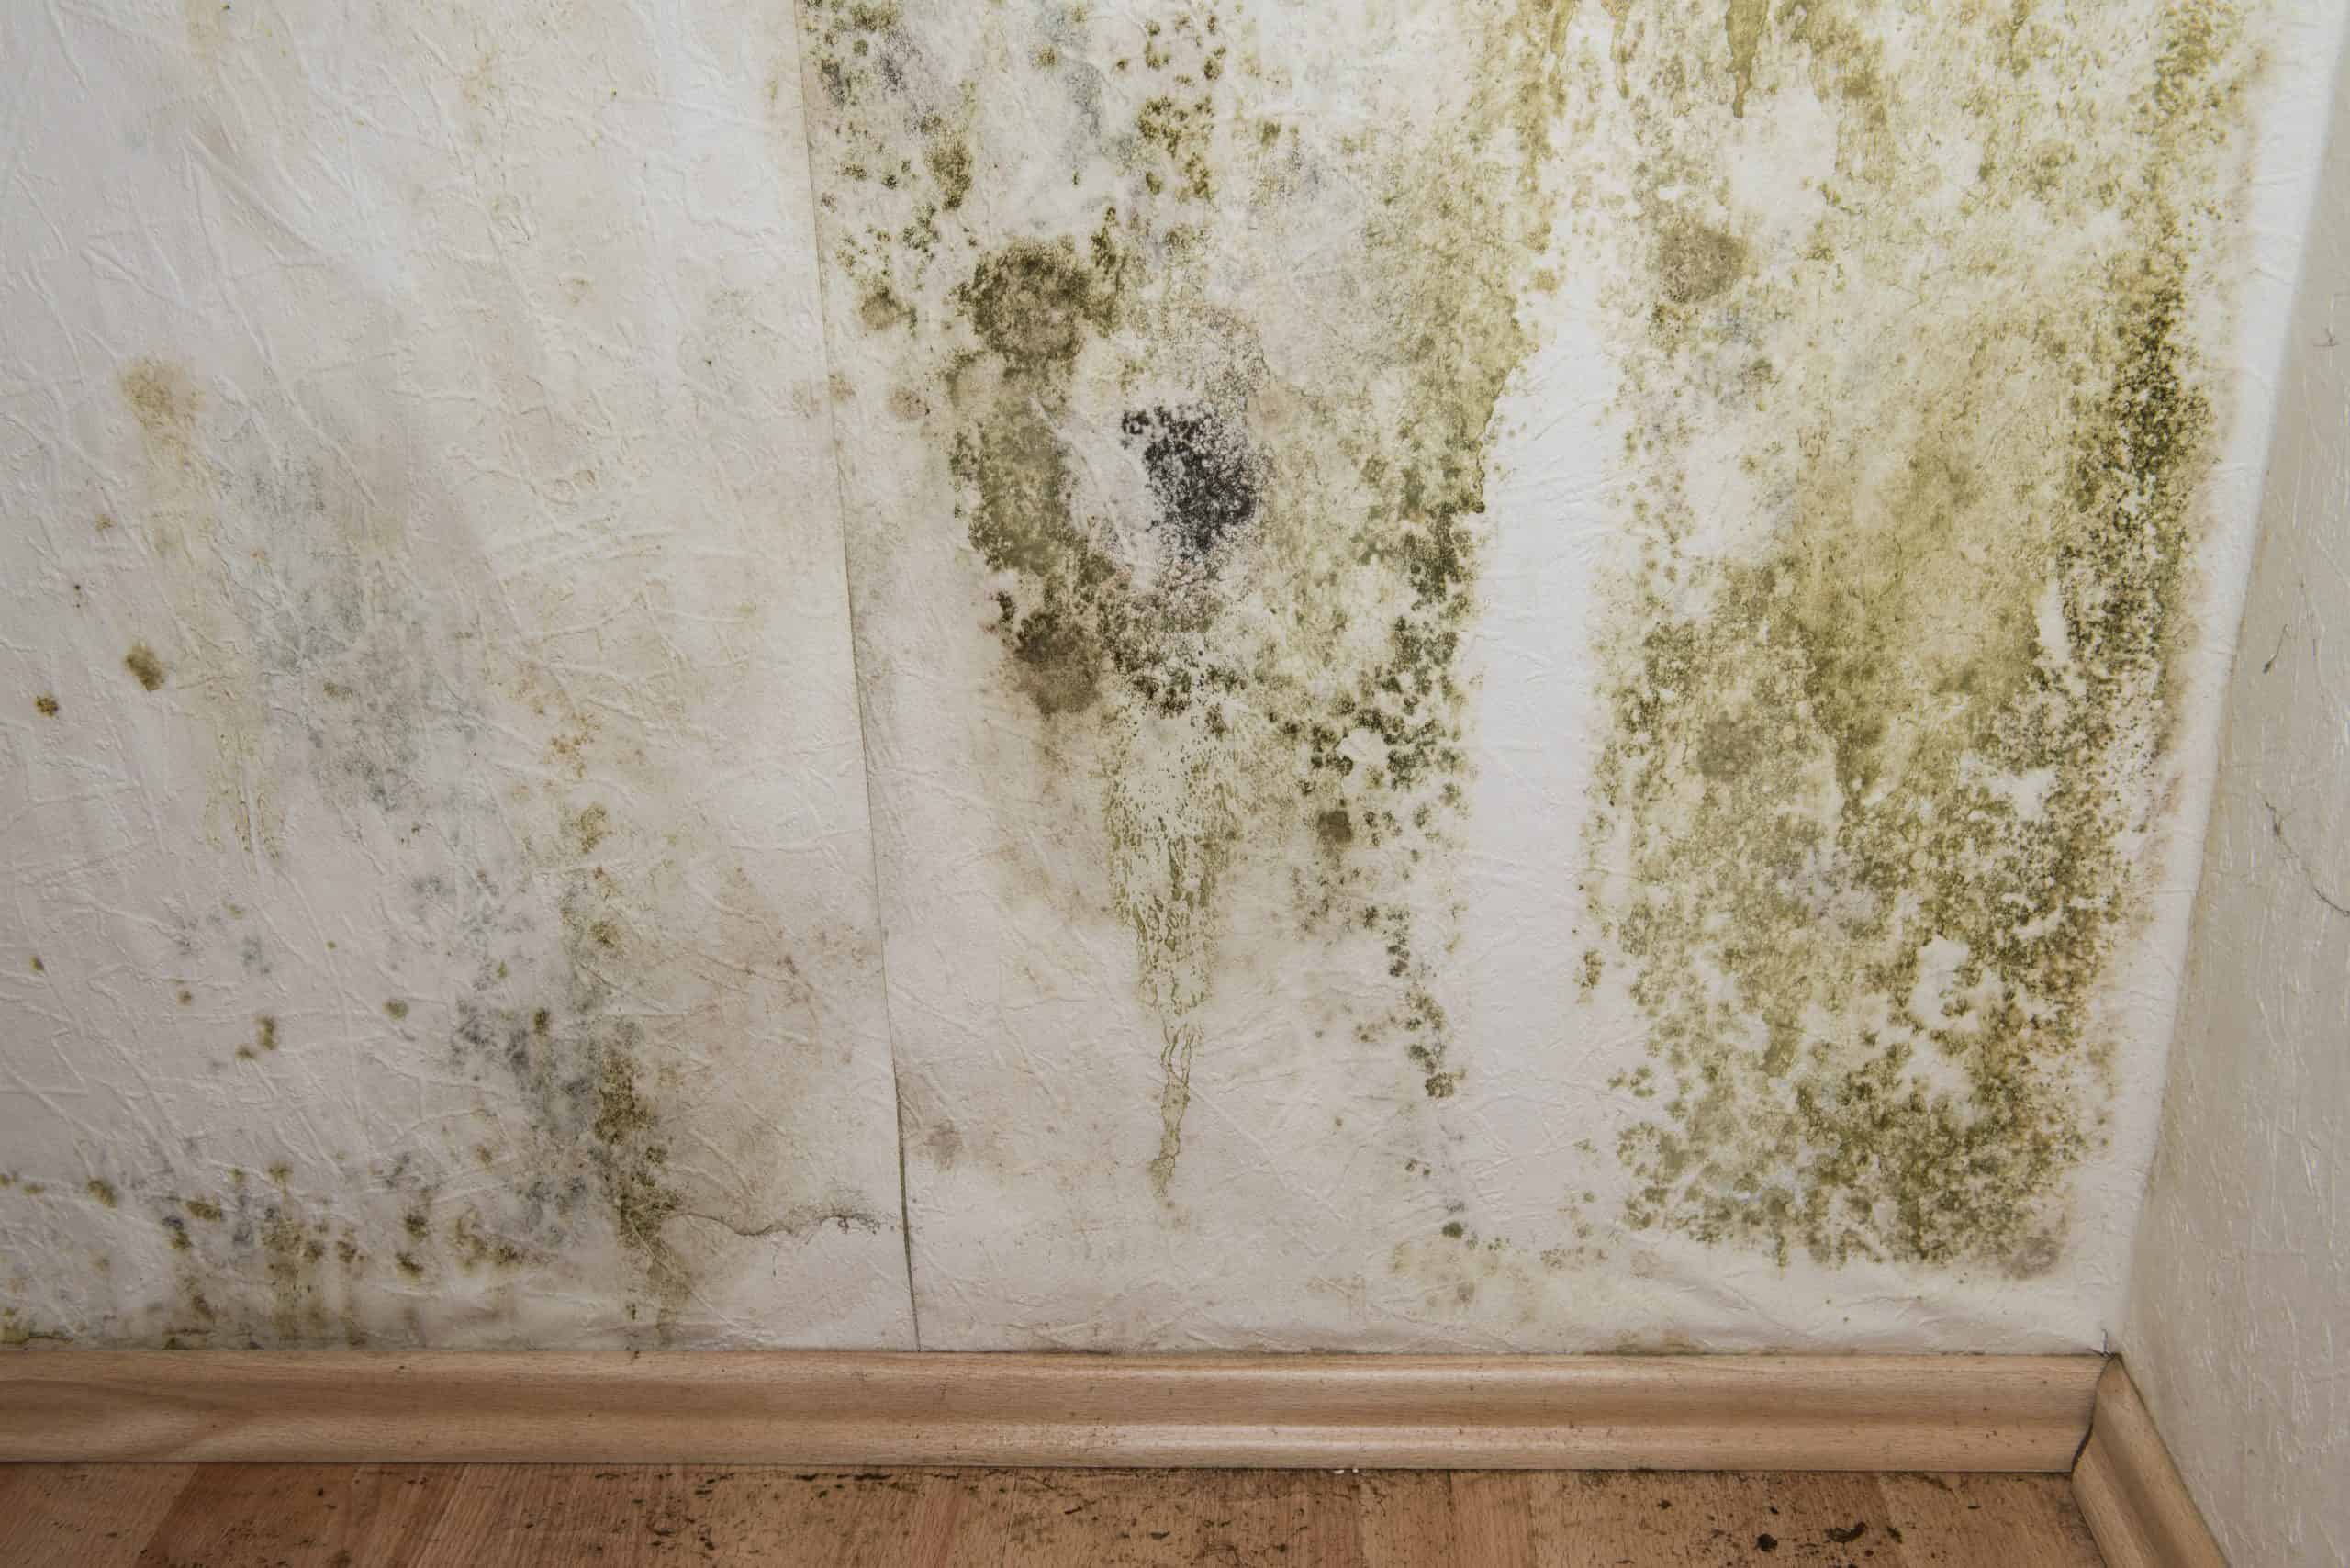
3. Molds and Mildew
Mold and mildew are types of fungi that can appear on your walls, often characterized by black, grey, brown, or green spots. These growths are not only unsightly but can also damage your walls and affect your home’s air quality. Mold and mildew thrive in areas with high moisture, poor ventilation, and lack of sunlight. Additionally, they tend to grow on surfaces that were painted with low-quality paints, as these paints often lack the necessary bacteria-resistant properties.
To tackle mold and mildew, there are some quick home remedies you can try. One simple solution is applying vinegar directly to the affected area. Vinegar is known to kill mold spores and can help reduce their growth. After treating the area, make sure to clean the surface properly to prevent further growth.
If the problem persists or is widespread, consider repainting the surface. Before you do, however, ensure that you use a stain-blocking primer. This type of primer prevents mold from reappearing by creating a barrier. Also, avoid using low-quality paint, as it might lack the protective properties that prevent mold and mildew growth in the first place. Choosing a high-quality, moisture-resistant paint will help prevent mold issues in the future and keep your walls looking fresh and clean.
By addressing the problem promptly and choosing the right products, you can protect your walls from mold and mildew and enjoy a healthier, cleaner living environment.
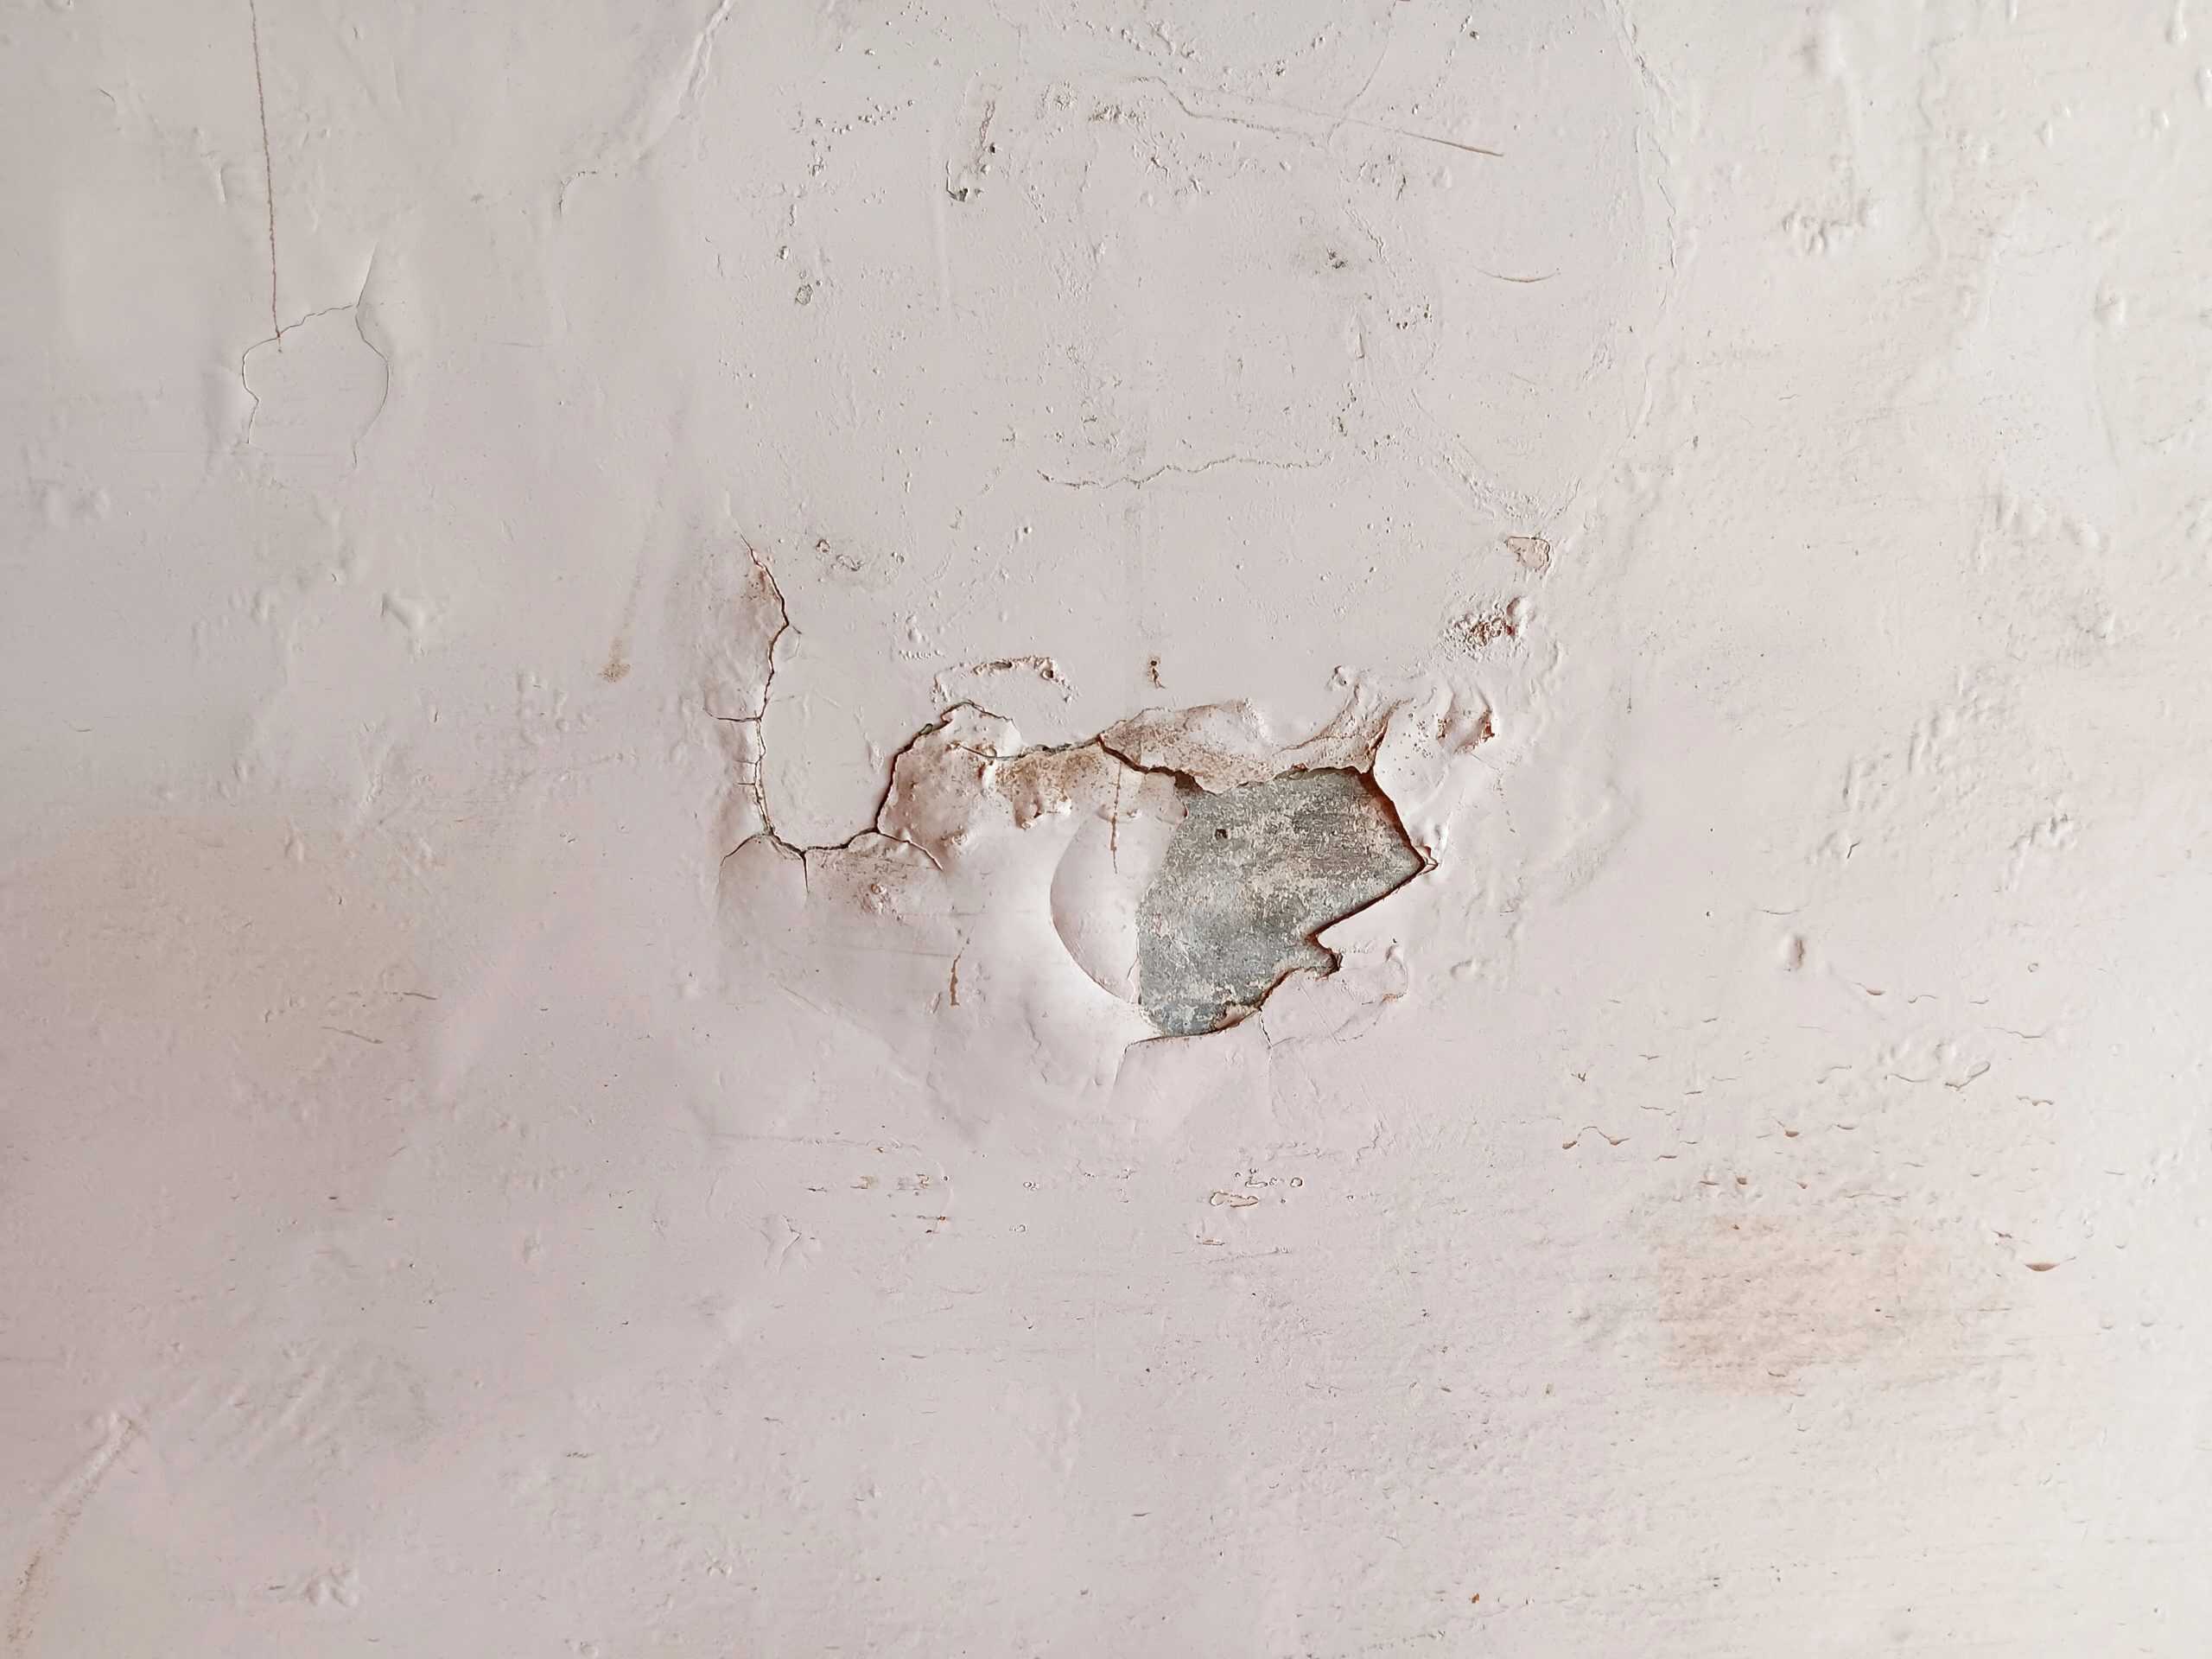
4. Peeling
One of the most common interior paint problems is paint peeling, and it’s definitely something you’ll want to address quickly. Paint peeling typically occurs when the paint loses adhesion to the surface underneath, which can happen due to a variety of factors. High moisture levels, applying paint over a dirty or dusty surface, or even poor-quality paint can all contribute to this issue.
To fix paint peeling, you’ll need to repaint the affected areas. But before doing so, it’s important to prepare the surface properly. Start by scraping off any loose, peeling paint, and make sure the wall is clean, dry, and free of dust or grease. This will help the new paint adhere better and prevent future peeling.
When you repaint, be sure to use high-quality materials. High-quality primers and paints are designed to provide better adhesion and durability, ensuring that the new coat of paint lasts longer and resists peeling in the future.
By following these steps and using the right materials, you can solve the peeling issue and enjoy a smooth, long-lasting paint finish!

5. Yellowing
Yellowing surfaces is a common paint problem, especially with lighter-colored walls. This issue often occurs with oil-based paints, where chromophores (molecules that change color) form in the paint. When the surface isn’t exposed to enough light, these molecules can cause a dark yellow tint to develop over time, creating that unsightly yellowing effect.
Another major contributor, particularly in areas like kitchens or bathrooms, is moisture. Constant exposure to moisture from water, oils, grease, and smoke can cause yellowing, especially on kitchen walls. The moisture makes the surface more susceptible to discoloration.
To solve this, you can try adding more natural or artificial light to the area to help prevent further yellowing. Additionally, you can clean the surface by diluting a quarter cup of trisodium phosphate (TSP) in a gallon of water and using this solution to scrub away the yellow tint.
If the yellowing persists despite cleaning, the best option might be to repaint using water-based paint. Water-based paints are less prone to yellowing and will give your walls a fresh look while providing better durability against moisture.

If you need professional help with your interior/exterior painting, Campbell Painting is here for you.
Our interior/exterior painting and washing services are available in Anchorage, AK.
Call us today at (907) 444-3657 for a FREE painting estimate.
Related: 7 Tips For Painting The Interior of Your Home in Anchorage, AK
7 Myths About Interior Painting That You Should Not Believe in Anchorage, AK

Ben Campbell is the proud owner of Campbell Painting LLC, a successful painting company based in Anchorage, Alaska. As a third-generation member of the painting industry, Ben has a deep-seated passion for his profession that started with his grandfather, who came to Alaska to sell paint. Born and bred in Alaska, Ben’s connection to his community is genuine and strong. Since 2006, he has been providing top-quality painting services, enhancing the beauty of Anchorage one building at a time. He also studied at Santa Barbara City College, solidifying his industry knowledge. Ben’s journey, including overcoming adversity, is a testament to his resilience and commitment to his craft, which is reflected in the success and reputation of Campbell Painting LLC.
Recent Comments